It has been a very busy few weeks, and unfortunately I have not been able to make any posts lately. Also, I had to be as efficient as possible getting the shelf finished, and I was unable to photograph and film the processes I used to build it. Most importantly, I finished the shelf and sent it off to my uncle. Here are some photos he sent me of the shelf after we hung it on the wall, and he adorned it with all of the art he wanted to display on it:
He also wanted some platforms for potted plants made out of the extra lumber I had from the walnut board. I had enough to make two different sizes, and we left them with the bark on, and the edges and ends rough sawn. It appears that they are serving him well too.
I received a commission from my uncle to build a natural edged shelf for his bedroom. It will hang on the wall above the TV. What we decided to do was design it after the style of furniture he has in his room which has Asian stylistic elements, and is an ebony color.
My first order of business was actually to strip off the bark. I know that sounds like the most heinous crime, but I have read many articles on working with boards with bark inclusions, and many have argued that keeping the bark can lead to it flaking or falling off, or potentially harboring pests. The bark peeled off very easily which made me feel better about my decision to remove it, as it could very easily have fallen off.
My next task was to establish the width of the board, and rip it to width. Neither edge would have worked as a reference edge very well due to the bark, so I snapped a chalk line along the bark to have an idea of what that edge would look like if it was sawn straight at the mill. I then measured the width from that line, and snapped another line. That line would be the one I would saw.
A wedged kerf
Sometimes wide boards like these that are kiln dried have a lot of tension stored in them, and when you cut them it is released. This can lead to binding on the saw plate. To reduce the friction on my saw plate, I rubbed paraffin wax on it, but this particular board had a great amount of tension, and it was a very long cut, so that did not suffice. I drove a wedge into the saw kerf to open the kerf a little more, and make room for the width of the saw. This helped tremendously.
Earlier this year, I was given the task to build a pair of shadow boxes for my neighbors' young boys. The boxes would display the boys' Harry Potter magic wands. I believe on of the wands was Dumbledore's and the other was Voldemort's. The boxes were to be skinny but long, with a hinged hinged door or lid with a glass pane, a felt trimmed interior, and hooks to hang the wands upon.
I used a cherry plank I had kicking around left over from when I built the bed last year. It is a very stable board because of how long it had been sitting around adjusting to my house's climate. I got a pane of glass from a hardware store and a glass cutter.
I needed a way to hold the back into the box, so I rabbeted the back edges of the box sides. This meant that I needed to conceal the rabbets so they were not visible from the outside of the box. To do this, joined the box together with mitered corner dovetails. I cut one dovetail and a straight tail at each corner. To cut the miter, a 45° line is marked on the edge of the board from the inside corner, where the baseline meets the inside face, to the opposite corner, where the face of the board meets the end. I purposely cut a tiny bit away from the line, so that the joint errs towards not seating all the way and then I saw the corner away until the joint seats. I'll try to make a video of this process next time a project I'm working on demands this joint.
The lid uses miters to hold the corners together, which I reinforced by cutting a kerf into the corner and gluing veneer into the kerf. This edge grain to edge grain glue joint is a very strong bond. The lid pieces are grooved in their edges to hold the 3/32 inch thick glass panel.
The bottoms of the boxes are lined with colored felt which corresponds to the house colors of each wand's owner. Dumbledore, as I learned, is from the Gryffindor house, and the box for his wand is lined with red felt and gold hooks hold up his wand. Voldemort is from Slytherin house, and the box for his wand is lined with green felt.
These boxes were finished with a 3:1 mixture of mineral spirits to polyurethane varnish. I love this finish for cherry for a number of reasons. Cherry usually starts out a pinkish-orange color, and turns brownish-red with age. This finish brings out the deep, dark cherry color I love almost immediately, and it only gets darker and warmer with age. I have used a varnish and mineral spirits blend on a number of other species, but it works wonders for cherry, and not as much for the other woods I have tried it on. I applied several coats of varnish to the boxes, rubbing it down with grey scotch brite to get rid of any dust particles stuck in the finish. This process produced a semi-glossy surface, and very smooth. I decided to leave it at that and not add any wax because I was satisfied with the surface quality, and they won't see a lot of wear, so the wax's protective properties aren't required. I truly enjoyed this project. It was a great first commission because it was manageable, yet challenging. I am very grateful to my first customers for giving me this opportunity, and I look forward to more experiences like it.
I have been very excited to bring you this post for quite some time. In June, I took a class at the Furniture Institute of Massachusetts with Phil Lowe on building a Queen Anne lowboy. Over the course of a week most of us completed the frame and shaped all four legs. At the end of the week, I had a lot of work to do.
My first task was to glue the table together after I had mortised the drawer runners into the back. Then there were sixteen dovetailed corners to make. I had to flush the post blocks to the aprons, make the knee blocks, and flatten the top and make the thumbnail molding.
Upon Phil's suggestion, I deviated from the plans, and chose to veneer the drawer fronts and add herringbone inlay. I chose crotch mahogany veneer for the bottom drawers, and curly mahogany veneer for the top drawer. Phil made the herringbone inlay by cutting a thin strip of walnut at a steep angle so the grain runs about 60° to the edges. I took over from there by sawing the stock into 1/16 inch strips which, when placed flat, the grain runs diagonal to the edges. The inlay is cleaned up, mitered at the ends, and glued into rabbets along the perimeter of the drawer's face to border the veneer. Then another piece is placed outside of that one, with the grain running opposite the first inlay border. This created the herringbone effect.
I finished the lowboy with ten thin coats of garnet shellac. The dark finish brought out the depth of the walnut, and enhanced the grain. The many thin coats resulted in a smooth, shiny surface. I then added two coats of paste was for added protection, and for an even smoother texture.
This was an amazing class, and a fantastic experience. I learned a lot and met a lot of great people. Watching Phil at work is truly something to behold. He devoted an enormous amount of attention to his students, and taught us techniques he has used for over forty years. I could not have built this piece of furniture without his help, and I am very fortunate to have had this opportunity right when I was beginning to expand my woodworking experience into period furniture styles.
Sorry about yet another delay in my blog activity. This time it was due to technical difficulties with uploading photos onto my computer. I have a host of exciting new projects to post about, starting with this one. In October, I made a dovetailed jewelry box out of mahogany with a lift out tray. This was destined to go to a very special recipient. It was a birthday present for Courtney, my girlfriend.
I decided to use five dovetails for the box, the outside tails are narrower than the middle three. It serves double duty as both a design element as well as the housing for the groove that holds the bottom and lid inside the box.
Because I used grooves to hold the bottom and lid instead of separate units, I needed to hide the grooves. I thought of a number of solutions to this, and finally decided to rabbet the ends of the tailboard about flush with the groove's bottom. This meant that the groove was eliminated from view, inside and out. There were drawbacks to this solution, most notably that the tails became only about 3/16 of an inch thick. I figured that the box will see minimal abuse; therefore, the extra thin tails wouldn't be a problem.
I used the same strategy for concealing the groove in the lift out tray
The tray nests inside the larger box, flush with the top edge.
The lift out tray nests inside the larger box, and contains the bottom with grooves and uses the same method of concealing the grooves with a rabbet. It rests on mitered slats glued to the inside faces of the box. These slats were carefully fitted to the inside dimensions, mitered, and then precisely fitted for width so that the tray has a continuous surface to sit on.
The bottom is lined with felt
The tray was intentionally sized larger than the space it occupies in order to be fitted later. I achieved a precise fit by taking shavings from the tray's faces until it coasted down on a cushion of air.
I finished the box with shellac and wax. My first step in this process was to lightly sand any imperfections out of the surface with 400 grit paper. Then I brushed on a coat of garnet shellac. The garnet shellac really brings out the depth of the mahogany. I then rubbed the finish with #0000 steel wool in between coats. In all, there were six coats of garnet shellac. I followed that up with paste wax. I place a scoop of paste wax in a rag, and work it across the surface, letting the wax seep through the cloth which coats the surface in a very thin film. The wax enhances the texture of the wood and gives the exterior an incredibly smooth texture.
This jewelry box was a fun, small project. I love making boxes because they are simple, yet stimulating, and very practical. My first project was a jewelry box, and I learned a lot from that, and each box I have made since then, I learn something new. When all was said and done, I was very excited to give it to Courtney, and she was delighted and surprised when she saw it. I would recommend something like this as a first dovetailed piece for anyone who is looking to put their dovetailing skills to use. It's small and manageable, yet rewarding nonetheless!
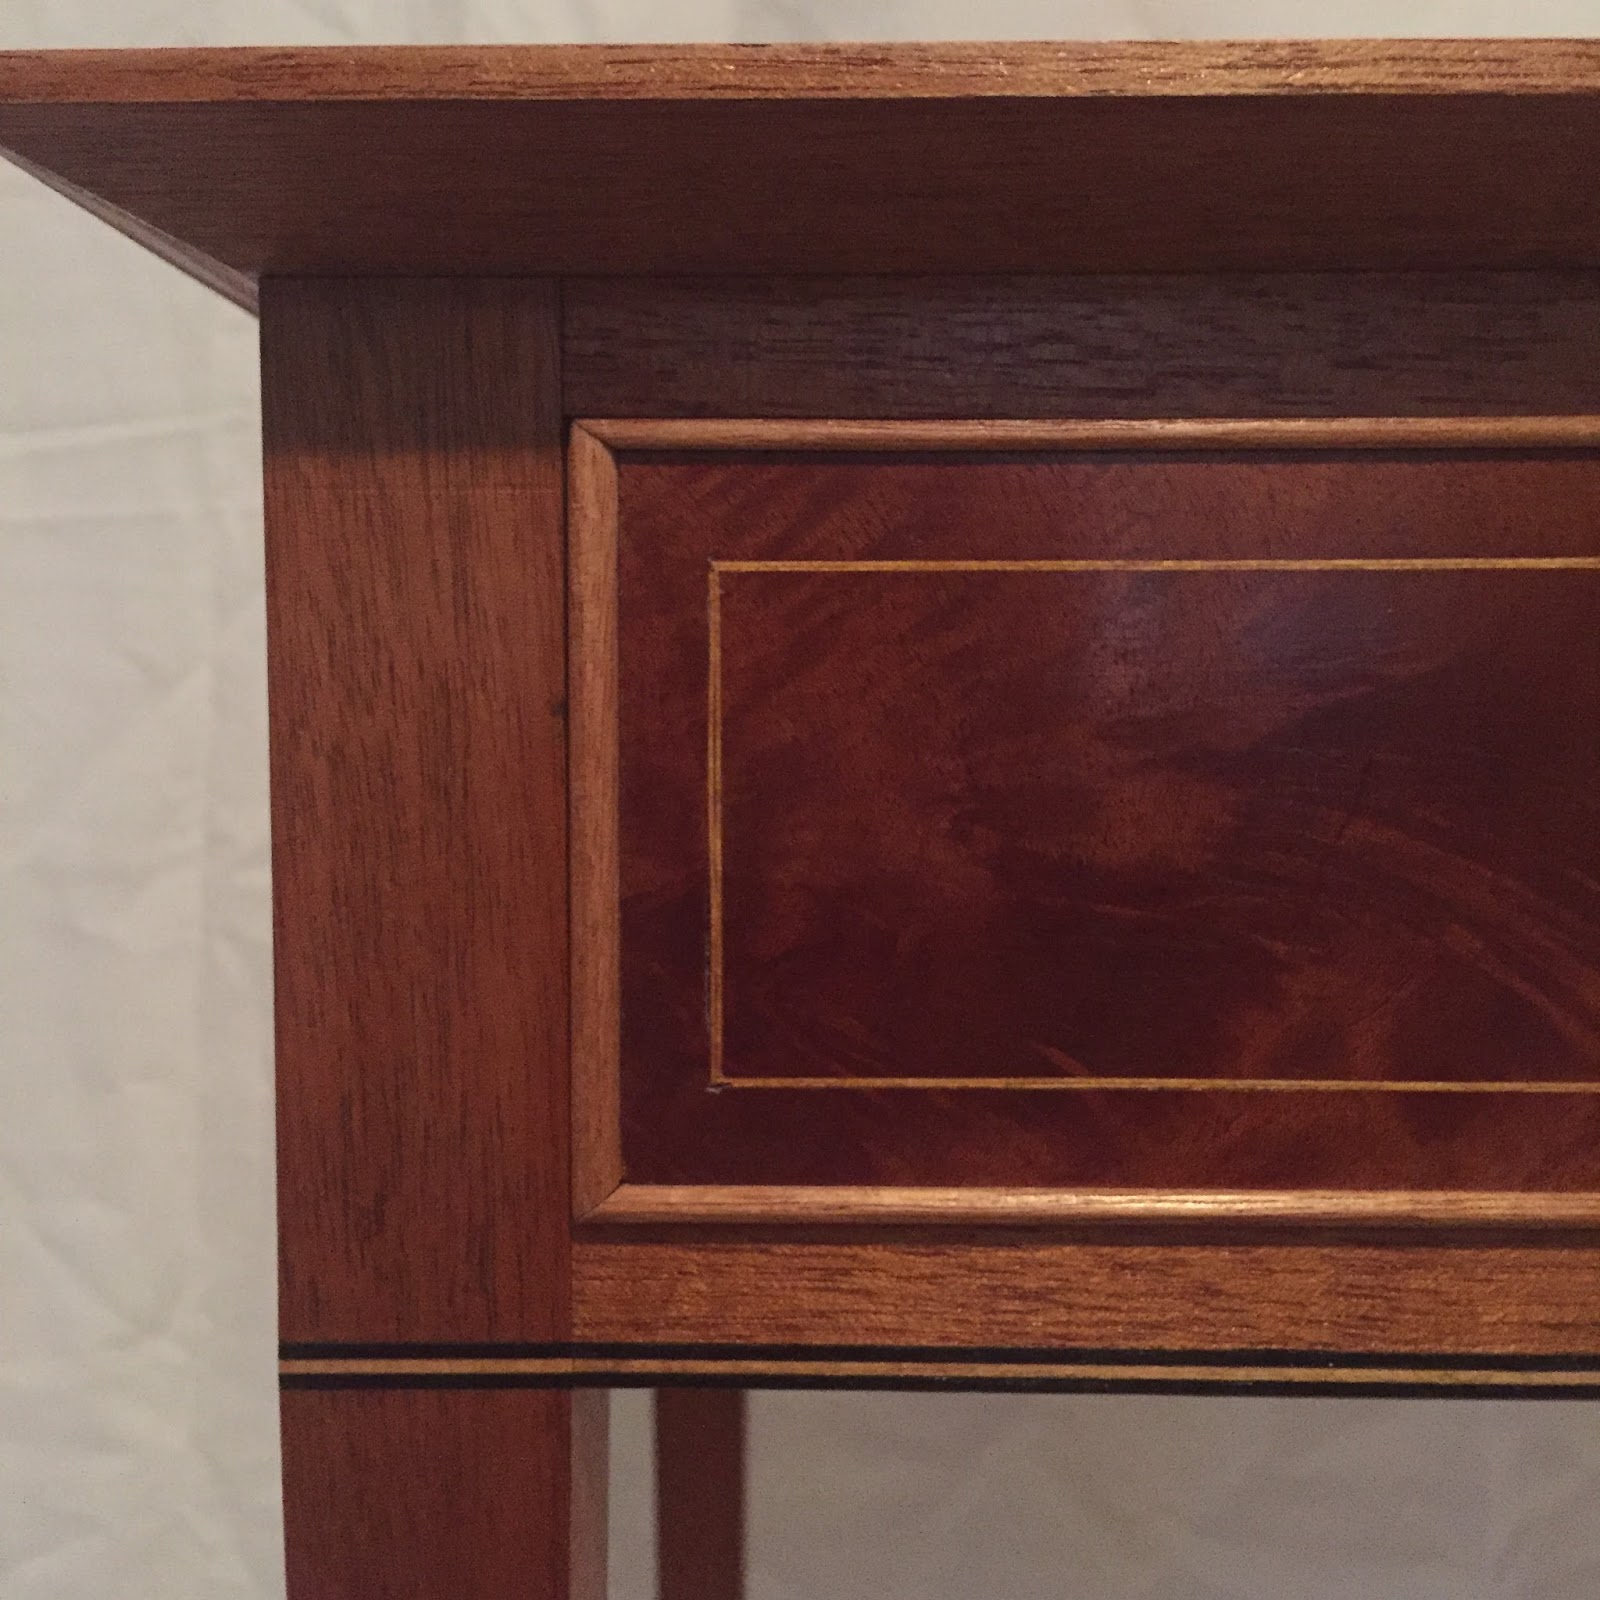
I have recently begun construction on a federal side table, inspired by Steve Latta in Fine Woodworking Magazine issue number 246. This is an elegant side table with simple, yet striking inlay details. It features a single drawer with a veneered face and cockbeading. This will be my first project featuring banding, inlay, and veneer, so I am very eager to get involved with this.
I chose to build mine out of mahogany, so I bought two boards from my usual lumberyard. One was a 5/4 board for the legs, and the other was 4/4, for the aprons and the top. To begin the legs, I cut a section from the 5/4 board about an inch longer than the required length. To get growth rings in the rift-sawn pattern, I took the stock for the legs out of the section of the board near the edges, where the annual growth rings are 45˚ to the face of the board. I then proceed to cut the other components from the 4/4 board, also adding about an inch extra to the required length, and ripping them to rough width.
I then stickered the boards and let them sit all week.
The legs need to be the most accurate part of the project. I also start with them so that I have a little extra energy and patience to ensure that the face is 100% flat and free of any twist, bows, or cups, and that the edge is perfectly square to the face. Only then can I make a mark for the width using a panel gauge and saw it to width.
After I have ripped four legs from the 5/4 stock, I pick out my 4/4 stock and saw out rough length boards for the aprons, drawer front, and rails. I will flatten each board in four steps:
Lengthwise passes down the center of the board with a jack plane
Traversing (perpendicular to the grain) to flatten the width
Diagonal passes with a fore or jointer plane to flatten a larger surface area
With the grain to smooth out the board, and get rid of any tearout that resulted from planing against the grain
I take a jack plane and take passes down the center of the board on the heart side to get rid of any bow across the surface which typically happens to the heart side of the board. This creates two points of contact for the plane during traversing. Over time, the traversing process will bring the bowed surface down to flat.
Typically the heart side of the board is bowed
Lengthwise passes down the center of the board create a concave portion of the face which helps flatten the width of the board when traversing
After I have taken passes with my fore plane across the surface of the, and created a continuous surface free of the mill marks from the sawmill, I will then take passes diagonal to the surface. Diagonal strokes encourage a flatter board because the plane sees a longer length, and flattens a larger area than working just perpendicular and parallel to the grain. The downside to diagonal passes is that half of them will be against the grain. When working in difficult woods like curly maple, there can be massive tearout. In this case, I usually use a toothed blade, or if I can, work perpendicular to the grain for as much as possible, and then take a high angle smoothing plane with the grain as the last step.
After I can't improve the surface anymore with diagonal passes, I check the board with winding sticks. These point out any twist in the board. Usually diagonal passes cure any wind in the board, but sometimes it isn't a perfect remedy.
From the photos you can see how winding sticks are placed on the board, and how sighting down them points out any twist in the board. In this case, there is no twist. If there was, there are two things I would do. If the board was short enough, and in this case it probably would be, I would take a pass from high corner to high corner, until I was taking a continuous shaving. Typically, if there is twist it will take a shaving at the beginning and end of the pass. If the board was too long to do this, meaning the board was more than twice than length of my plane, I would take diagonal strokes with the plane in the high areas, and keep checking the board with winding sticks until the twist was eliminated.
The frame is held together with mortise and tenon joinery, and the legs get a double taper. The first taper is marked out, and then I take short passes at the bottom end of the legs, and the gradually get longer towards the top. Then the banding is inlaid on the bottom edge of the aprons and around the legs. It is important to make all the measurements for the tenons from the bottom edge because the bottom edge banding should join line up perfectly with the banding on the legs. A few inches up from the bottom end of the leg receives a cuff banding, and the secondary taper begins after the cuff. I didn't film these processes, but here's what the finished leg looks like.
I then fitted the drawer front and sized the sides and back, and cut the dovetails for the drawer. I then dovetailed the drawer. After that I veneered the drawer front with crotch mahogany veneer
and inlaid the stringing.
This is where I went wrong. I waited to glue up the drawer until after the inlay and cockbeading was done. What I should have done was glued up the drawer and fitted it precisely to its opening first, and THEN inlay the stringing and cockbeading. The way I did it resulted in inaccuracy because removing 1/8 of an inch or so for the cockbeading meant that I was removing that width from the unfinished size, and the edges of the drawer had to be planed to fit after the beading was glued on. The fit would have been much more precise and better looking if I glued the drawer together and fitted it before adding the inlay and cockbeading.
Drawer dovetails
The table got a finish of garnet shellac. I had extra mahogany left over from this project which I used for the jewelry box, so I had seen how garnet shellac looked on it, and I loved it. I used the same finish as the jewelry box on the table. I brushed on eight coats of shellac, using #0000 steel wool in between coats. I followed that up with two coats of paste wax. The drawer front got a French polish. It had been a long time since the last time I french polished something, so I was a little rusty, but the result was ok. This was a great first table for me. Although it could be considered my second if you count my workbench as my first. It was a very detailed project which I loved because up until now most of my work had been shaker inspired, and fairly simple. This project was a great introduction to the federal style, and I am looking forward to building more projects like this piece.
I know I am several weeks late in posting about Handworks, but as promised, here it is. The conference was a blast! I met a lot of very interesting people and got my hands on a lot of tools that otherwise I would not have the opportunity to do so. I also went to the Studley tool chest exhibit in Cedar Rapids. I got to see the chest, workbench, and even met Don Williams, who organized the exhibit, and wrote the book Virtuoso: The Tool Cabinet and Workbench of Henry O. Studley.
Here are the photos from the exhibit:
Some notable people who were at the conference were Carl Bilderback and Roy Underhill. Mr. Bilderback sang the national anthem Saturday morning, and I must say, for a man of his age he has an amazing voice. Roy Underhill made a presentation about the history of the axe, which surprised me by being almost like a stand-up comedy act. The full presentation is on the Benchcrafted blog here. I got to meet both of these influential men in person. I had been waiting for a long time to shake their hands, and it was well worth it.
All in all, it was an amazing weekend. I had been waiting impatiently for it for months, and it did not disappoint. I am so glad to have been able to make it to this incredible event, and I doubt that there will be any other conferences that are anywhere near as spectacular as this year's.